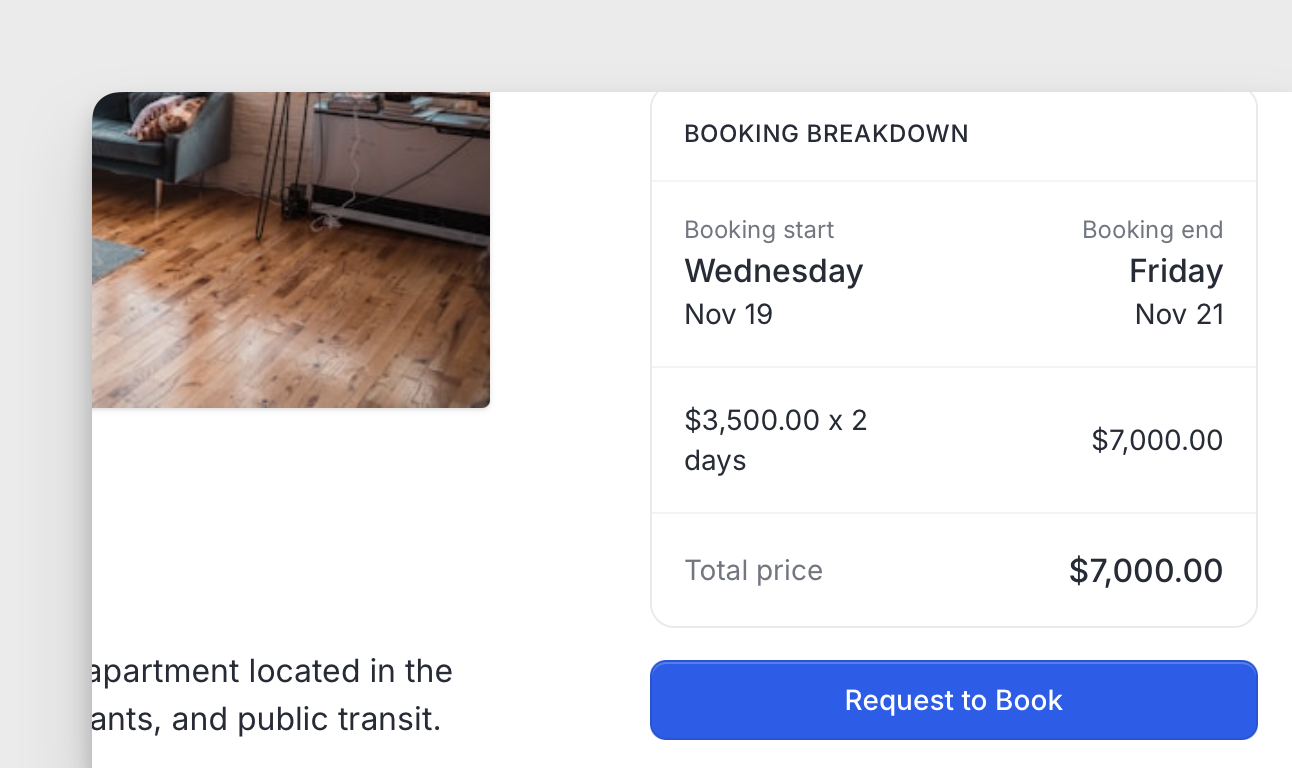
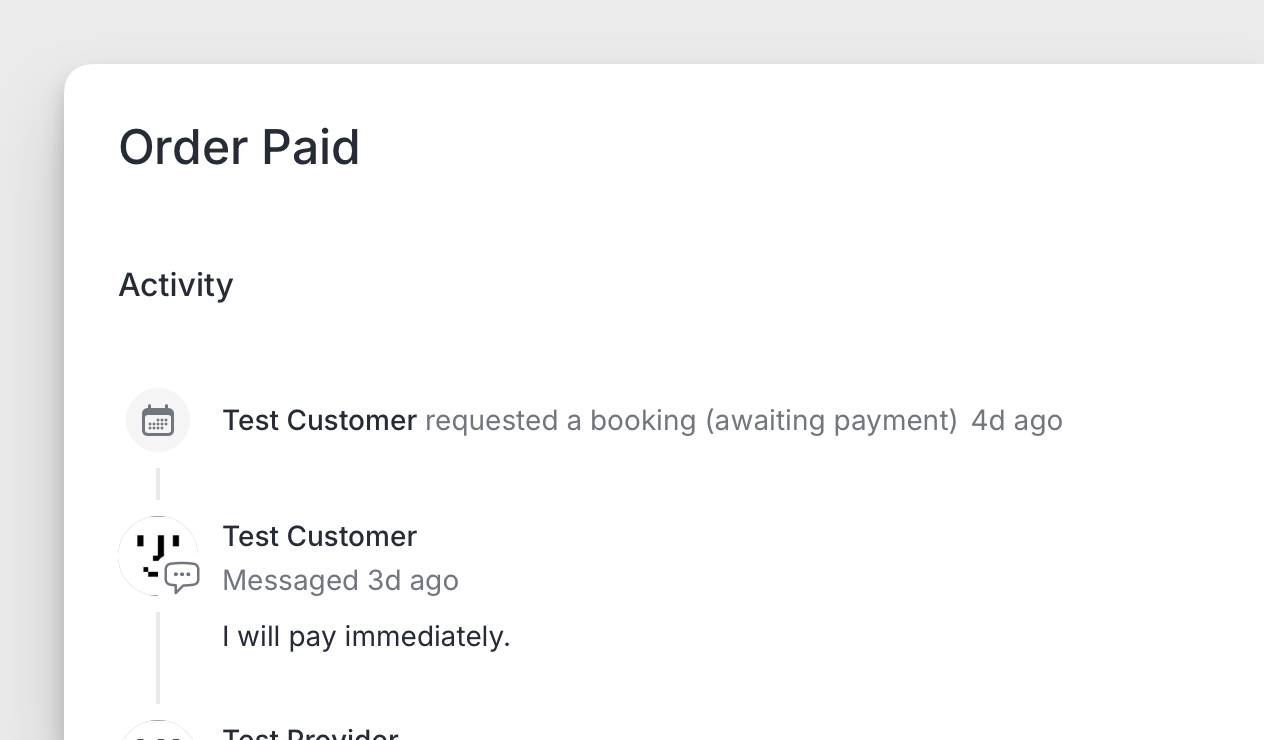
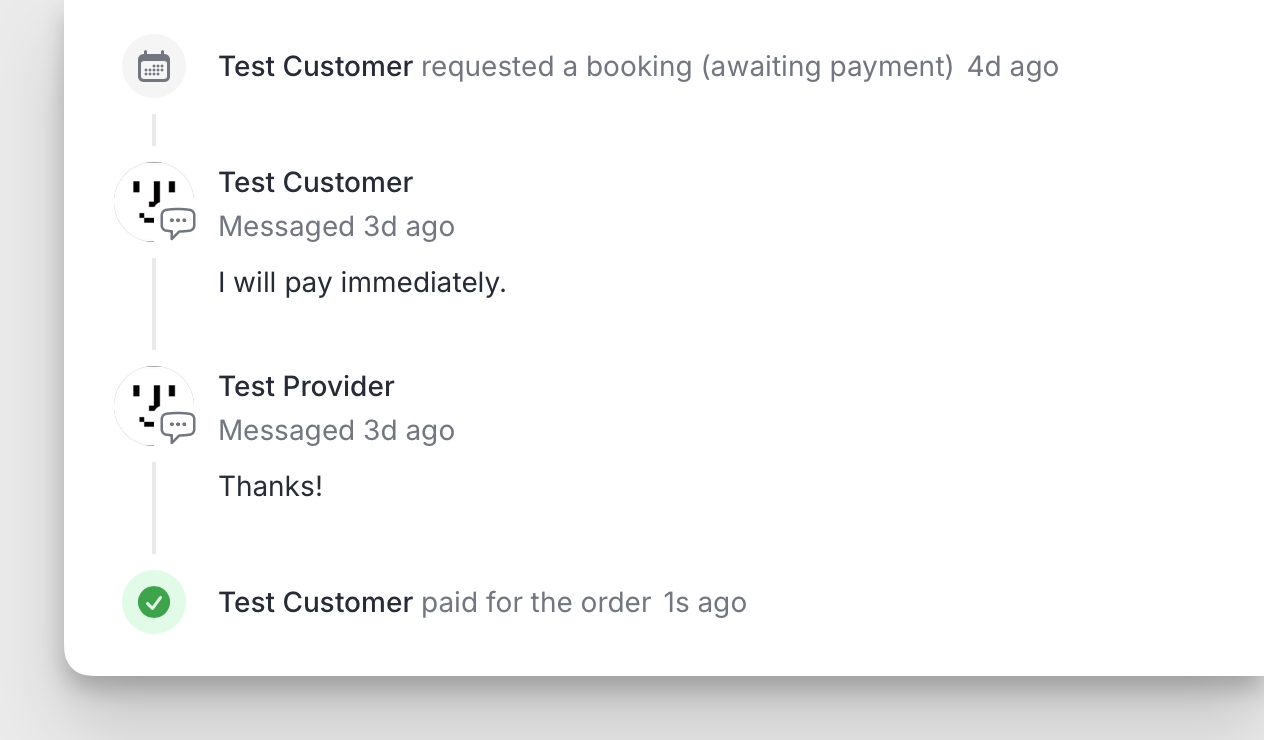
Marketplace magic, minus the agency fees for founders who hate waiting

Launch a full-featured marketplace in less time than it takes to finish your coffee. No dev team, no endless meetings, no nonsense—just your idea, live and ready for business. It’s fast, flexible, and honestly, probably more fun than it should be.

Brought to you by Oliver Servín

Booking payments

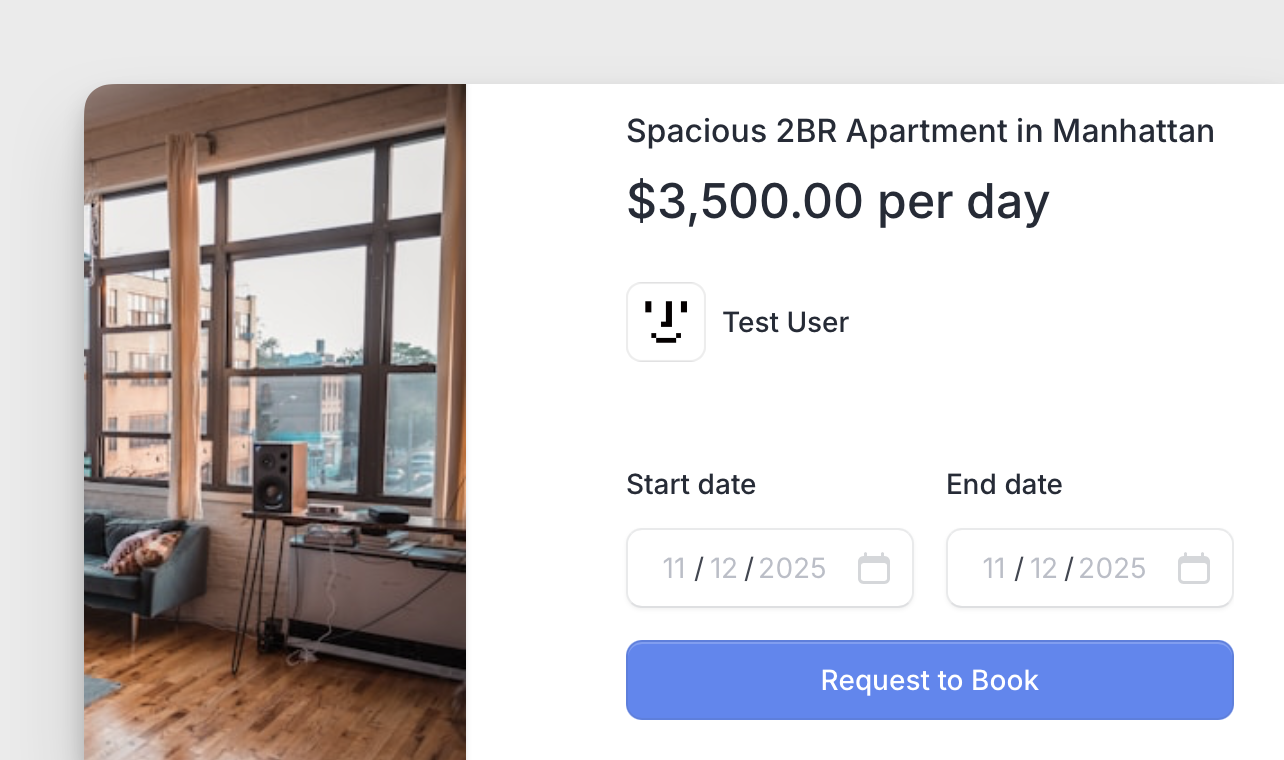
Now that providers can enable payments with Stripe and its Connect features, customers can make payments for their booking requests.

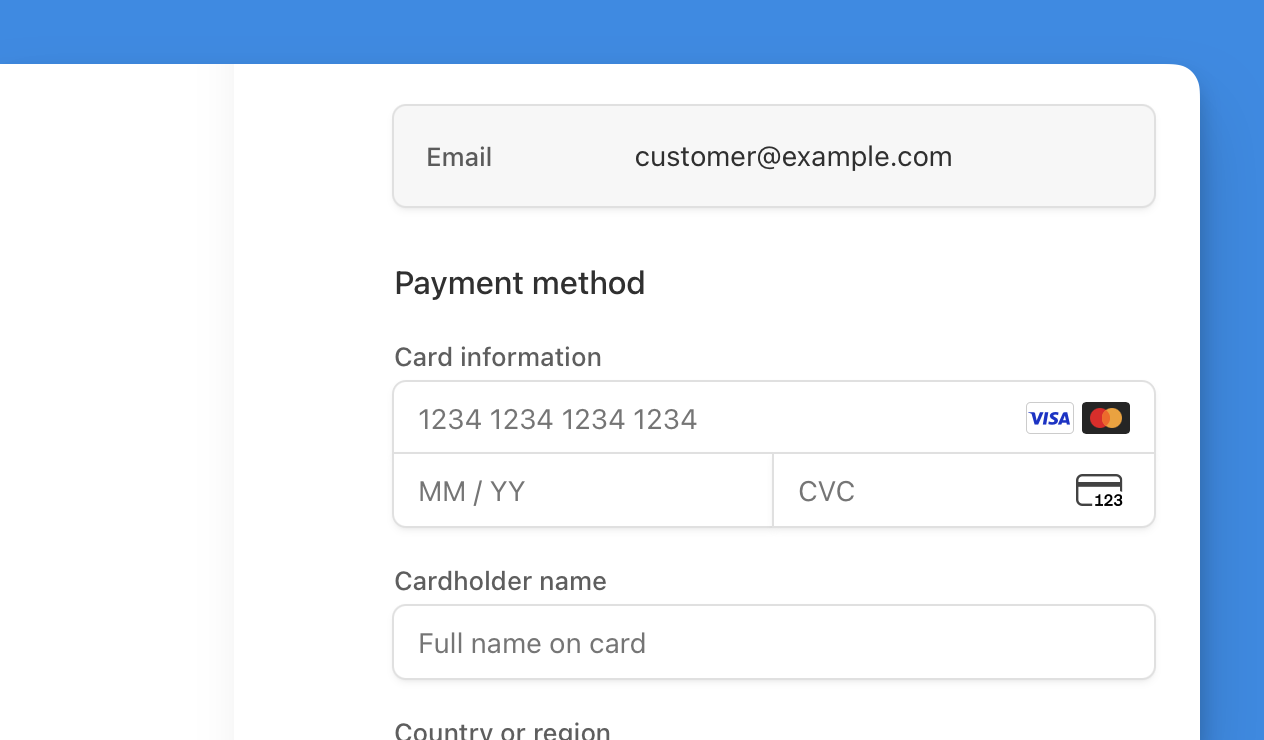
The platform uses Stripe Checkout, so when customers proceed to pay, they are redirected to Stripe Checkout to complete their booking payment. Once the payment is successful, the order is updated to reflect that the payment has been received.


Stripe Connect Onboarding

To enable providers to receive direct payments from customers in the marketplace, I'm using Stripe Connect features. This approach streamlines the process of accepting and receiving payments.

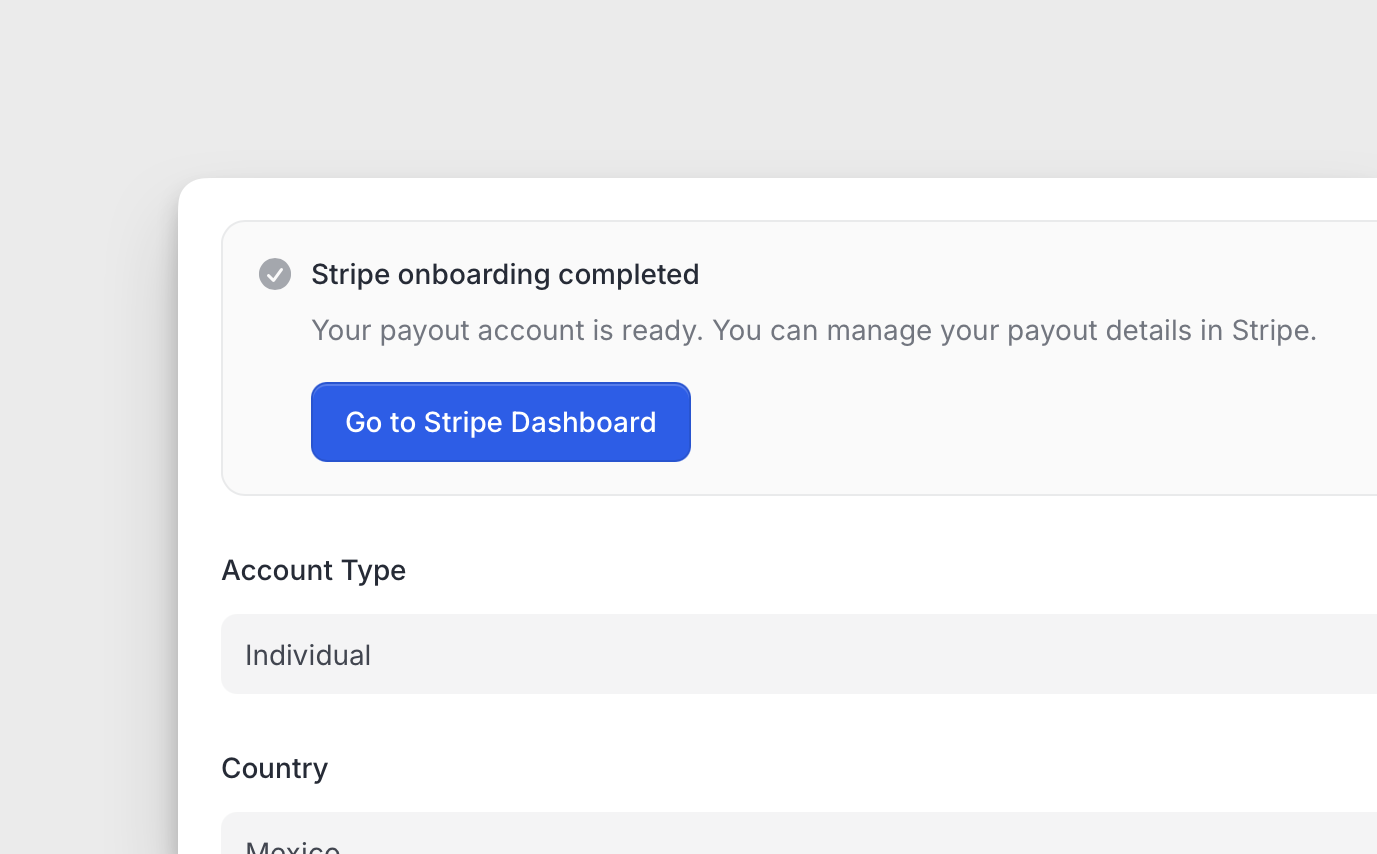
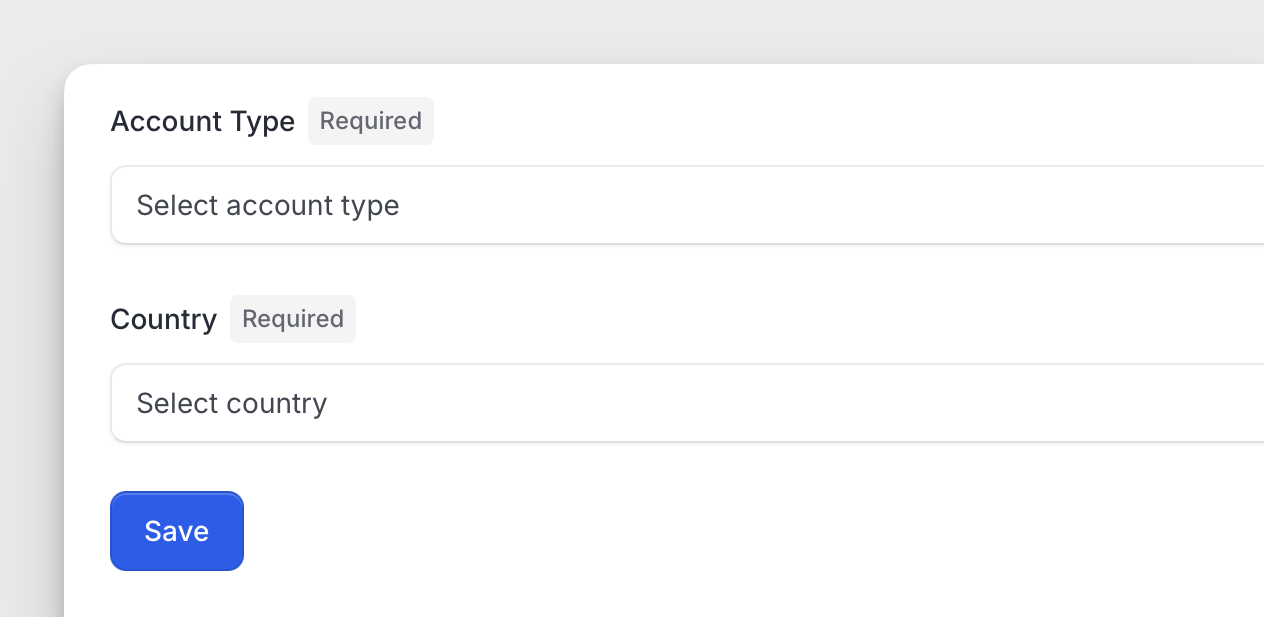
The process begins when the provider selects their account type—either individual or company—and chooses their country of operation. Stripe requires this information to create a Stripe Account.

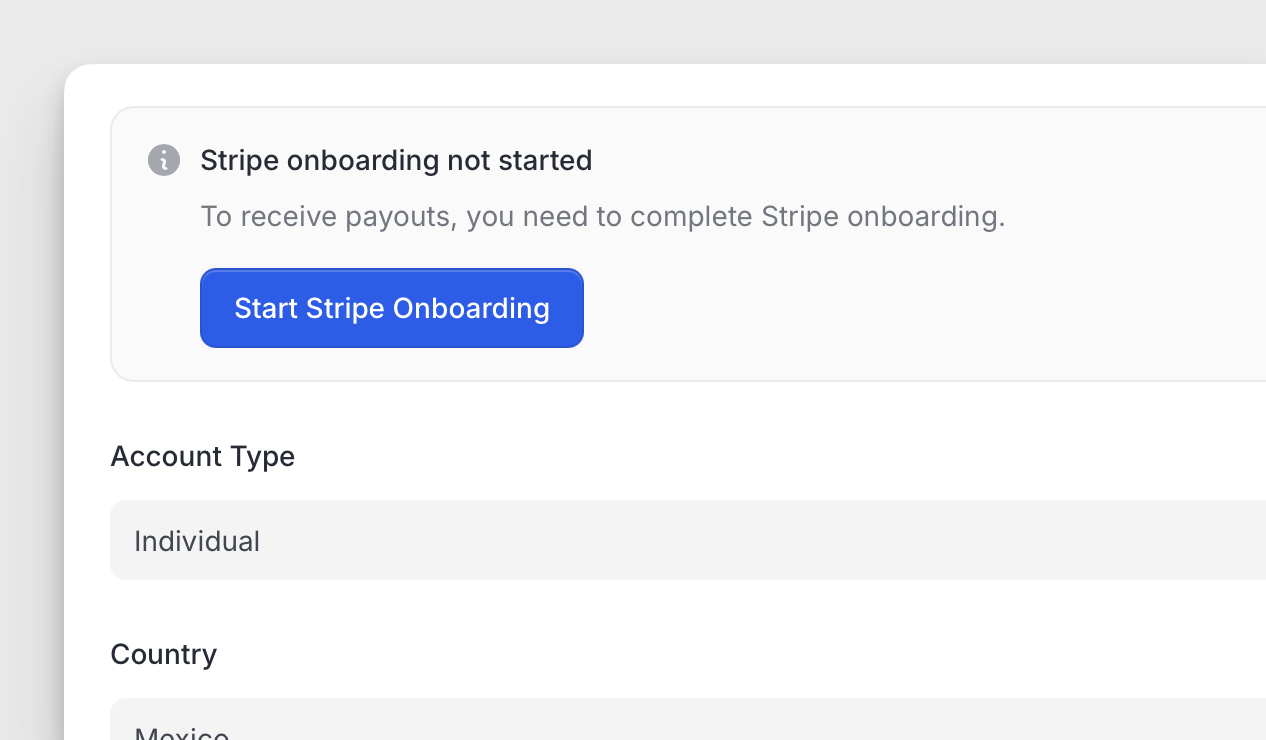
Next, the provider must complete the Stripe onboarding process to set up their account before they can accept payments.

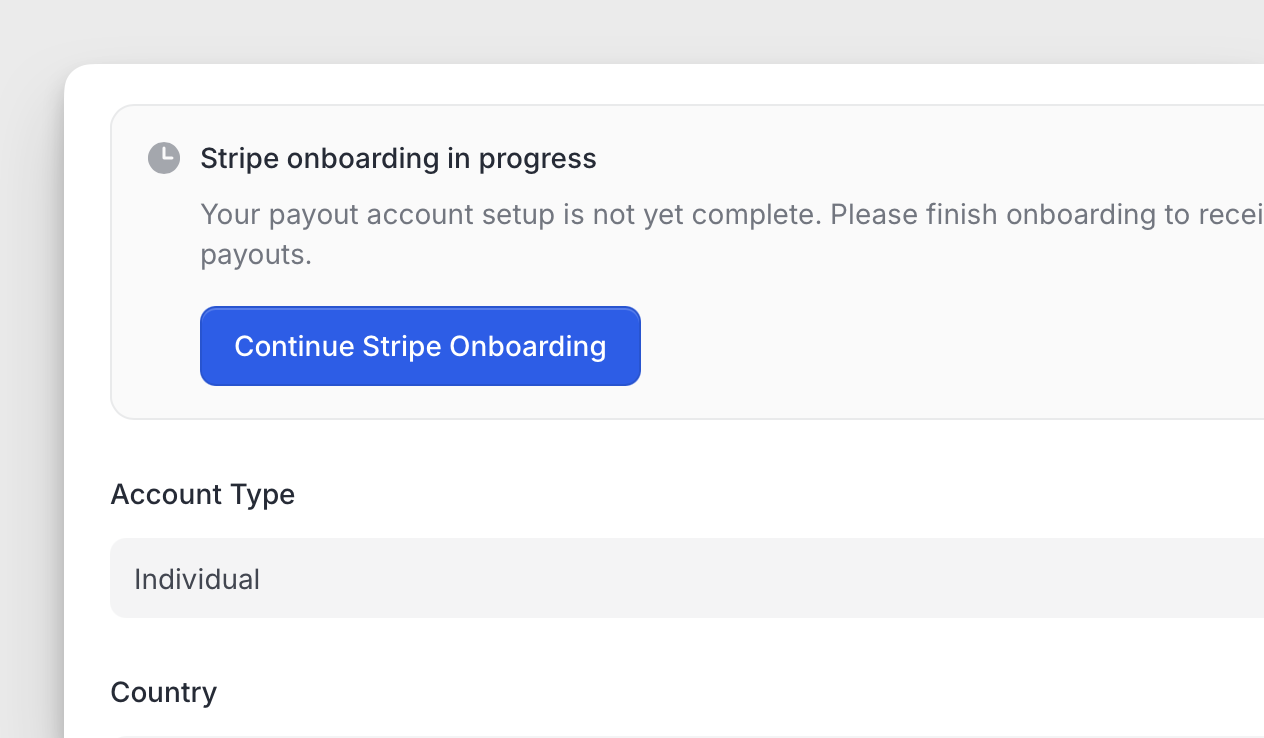
The onboarding process includes several steps and may take more than a few minutes to finish. However, the system tracks the provider's progress, allowing them to resume the onboarding process from where they left off.

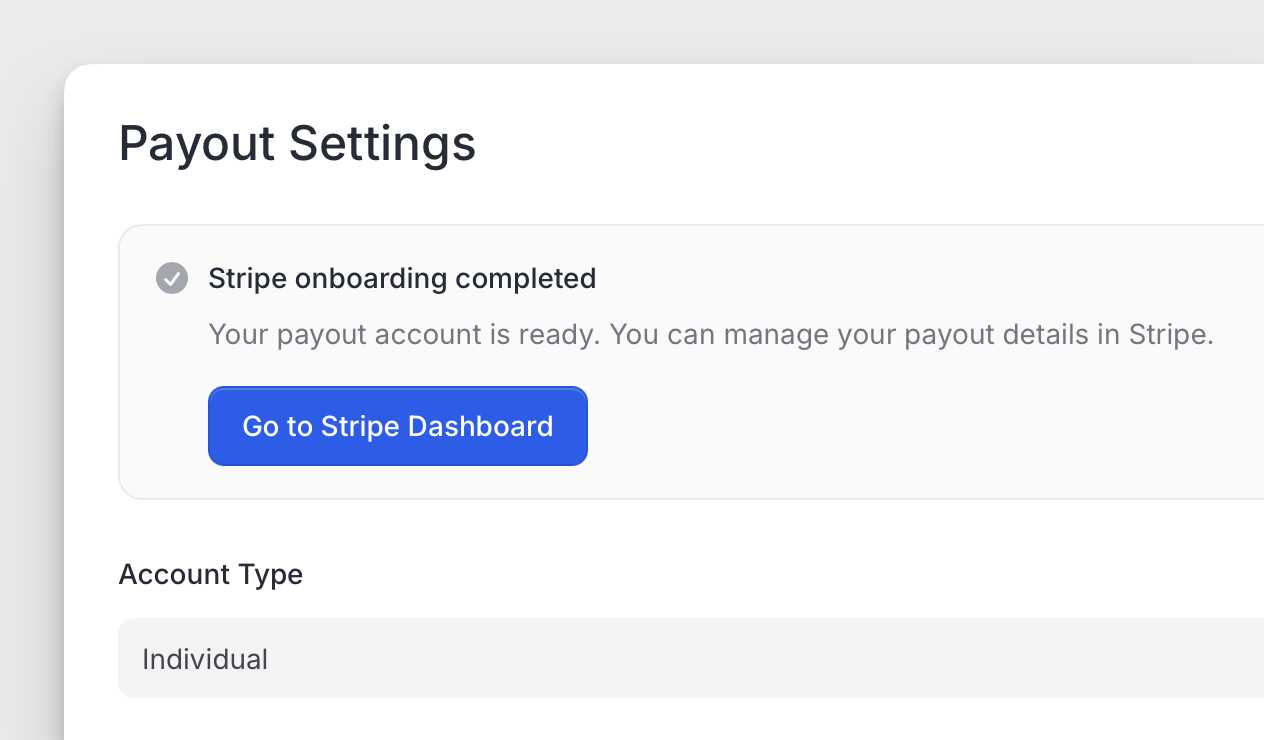
Once onboarding is complete, the provider can access their Stripe dashboard to monitor payment activity.

Requesting a book

I completed the design for requesting a book.

The process begins with users selecting a date range. First, they choose the start date, then the end date. The "Request to Book" button remains disabled until users finish selecting both dates.

Next, users see a breakdown of their booking, including the start and end dates with the corresponding day of the week and calendar view, helping them confirm their choices.

Finally, users receive a summary of the amount to pay, calculated by the number of selected days and the total booking price. Once users review this, the "Request to Book" button becomes active, allowing them to continue to the payment process.


Multistep listing submission

Made the publishing process smoother by splitting the submission into five steps.

Details

First, enter the listing's general details, such as the title and description, with clear indications that both fields are required.

Location

Next, provide the listing location by entering the address and, optionally, the apartment, suite, or building number.

Pricing

Then, set the pricing for the listing.

Availability

After that, configure the listing's availability.

Since this is for a rental property, select a time zone, set a default weekly schedule by choosing available days from Monday to Sunday, and optionally configure availability exceptions to specify date ranges when the listing is either available or unavailable.

Photos

Finally, add photos to the listing to capture visitors' attention.

Magic Auth

To make user sign-in to the marketplace easier and more accessible, I have implemented authentication via Magic Auth.

Users no longer need to create or enter a password to register or log in. Instead, they only enter their email and receive a confirmation code to complete the registration or login process.

I hope this authentication system increases the conversion rate from visitors to marketplace members.

Publishing listings

Worked on the backbone for publishing listings. The process consists of five steps: entering listing details, specifying the location, setting the pricing, defining listing availability, and uploading photos.

For listing availability, users can set a default weekly schedule when the listing is offered. They can also add date range exceptions to specify when the listing is available or unavailable.

I also made photos a required step, as most visitors now expect to see visuals of the listings.

Paths overview

Completed the overall outline of the web paths Anticonnect will use. These include paths for displaying the marketplace landing page and searching the marketplace. There are also paths for static pages such as About, Terms, and Privacy Policies. The inbox paths let users view received messages. Consumers have a path to view their orders, while providers have a path to view their sales. There are paths for displaying individual orders or sales, and for creating and viewing listings. Providers can access a path listing all their created listings.

Paths exist for editing listings, including details, location, pricing, availability, and photos. Users can view and edit their profiles, update contact information and passwords, configure payout options, and set up payment methods. There are paths for login and registration pages for new users.

On the admin or control panel site, paths display all marketplace users and allow editing their information. Admins can view and edit all listings, as well as see all platform transactions. Paths display all user reviews with options to edit them. For marketplace configuration, paths set the marketplace name, domain, email provider, localization, and access settings.

Admins can manage pages by viewing, editing, or creating them. Paths configure the top navigation links. Additional paths allow editing the footer, including social media links and content blocks. There are paths to manage branding elements like logos and layouts. Paths exist for setting up user types and customizing user fields.

Other paths handle the configuration of listing types, custom listing fields, and categories. Admins can configure search settings, transaction handling, and marketplace commissions. Lastly, there are paths to configure Stripe, the map provider, analytics, and Zapier integrations.